The arrival of Shanghai's chilly winter air signifies a number of things, among them:
1) The approach of the school holidays;
2) More cold and wet weather;
3)A sharp increase in air pollution levels and the number of 'red' air days, when we can't play outside.
These three things generally mean I end up with... MORE TIME FOR CRAFTING! So today, I let the kids run riot in the living room and finally got started on a project that's been brewing in my mind for a while.
My lovely mum, when she came to visit us during October half term break, brought me a little shop stall from England. It's adorable! I love it! I've managed to find a picture of it on Google but the link isn't right and I can't track it down on Amazon or anywhere. But this is an image of the basic structure.
It's very versatile with a simple stall, back wall and a roof. I bashed mine a bit in the construction and leveled out the counter top. I know that a sloped surface works great for displaying food and smaller items but I'm after something more staggered and multi-layer in terms of display and so I wanted a flat surface to work on.
When I first laid eyes on it, the clean lines and simplicity of the construction, set me to thinking about the amazing remodelled Lundby houses that I've been swooning over on Pinterest, like this one from Pandurohobby, and this absolute gem from Mousehouse. I just adore those amazing wallpapers against the stark whites, like this funky little house too, from Craftiness is Not Optional.
I wanted to make a little gift kiosk to display some of the things I've been experimenting with, using some wicked cool scrapbooking supplies. Here's what I came up with today.

So clearly, my photography skills need work, and my backdrop is not exactly great. I have to admit - as much as I enjoyed doing this, I found myself fantasising about the next two steps of this project. But I'll get to that later.
Here are some close-ups.


The stag's head is a lasercut from Kaisercraft that I mounted on a piece of scrapbook paper wrapped around heavy guage card. The tiny blue skulls came from Chinatown in Bangkok, the lillies are from Chatuchak market, also Bangkok, and the cloches are from a craft shop on Hennessy Road in Hong Kong.

These gorgeous little giraffes are from a bloke in Tianzifang market, Shanghai, who makes models out of old drinks cans. The picture is a frame I've posted about before here, and a piece of scrapbooking paper. I think the picture is cute but what really grabbed me was the relationship between the red dress and the teal frame. *Pop!
So there it is. Stage one of a three step plan.
Anybody else's creative journey look like this???

1) The approach of the school holidays;
2) More cold and wet weather;
3)A sharp increase in air pollution levels and the number of 'red' air days, when we can't play outside.
These three things generally mean I end up with... MORE TIME FOR CRAFTING! So today, I let the kids run riot in the living room and finally got started on a project that's been brewing in my mind for a while.
My lovely mum, when she came to visit us during October half term break, brought me a little shop stall from England. It's adorable! I love it! I've managed to find a picture of it on Google but the link isn't right and I can't track it down on Amazon or anywhere. But this is an image of the basic structure.
It's very versatile with a simple stall, back wall and a roof. I bashed mine a bit in the construction and leveled out the counter top. I know that a sloped surface works great for displaying food and smaller items but I'm after something more staggered and multi-layer in terms of display and so I wanted a flat surface to work on.
When I first laid eyes on it, the clean lines and simplicity of the construction, set me to thinking about the amazing remodelled Lundby houses that I've been swooning over on Pinterest, like this one from Pandurohobby, and this absolute gem from Mousehouse. I just adore those amazing wallpapers against the stark whites, like this funky little house too, from Craftiness is Not Optional.
I wanted to make a little gift kiosk to display some of the things I've been experimenting with, using some wicked cool scrapbooking supplies. Here's what I came up with today.

So clearly, my photography skills need work, and my backdrop is not exactly great. I have to admit - as much as I enjoyed doing this, I found myself fantasising about the next two steps of this project. But I'll get to that later.
Here are some close-ups.

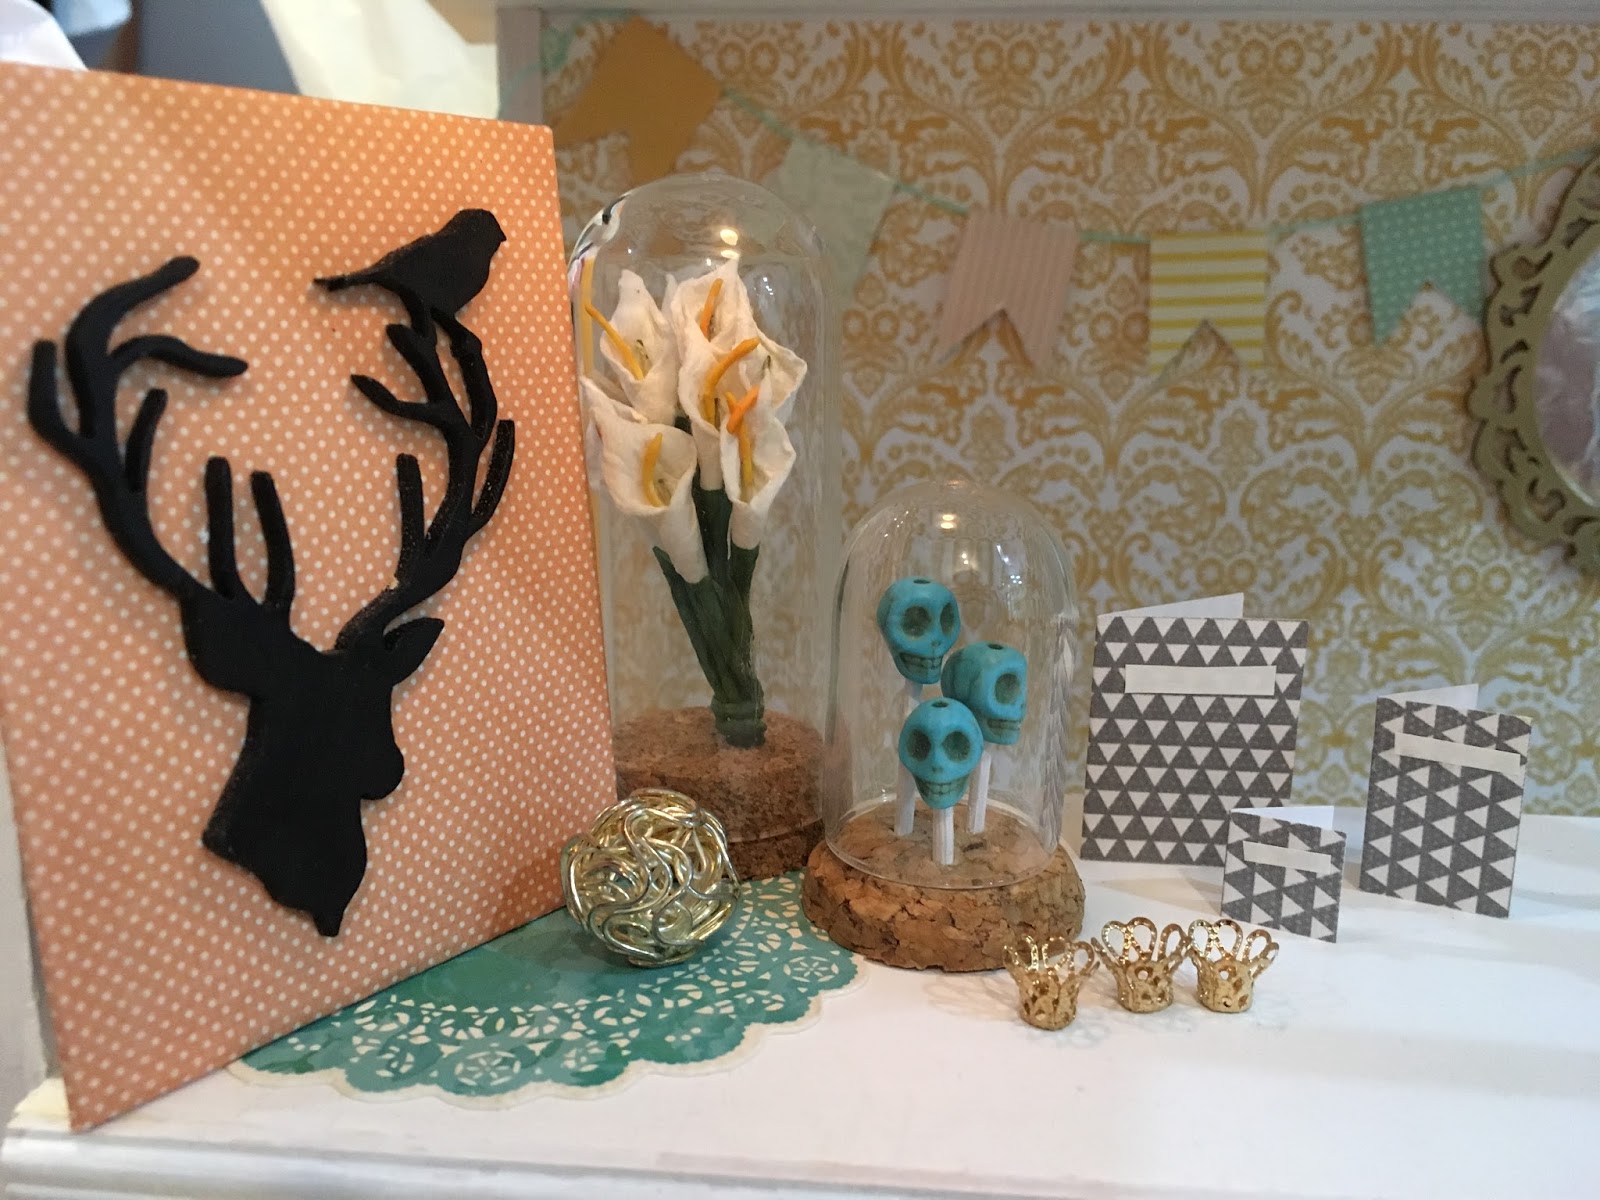
The stag's head is a lasercut from Kaisercraft that I mounted on a piece of scrapbook paper wrapped around heavy guage card. The tiny blue skulls came from Chinatown in Bangkok, the lillies are from Chatuchak market, also Bangkok, and the cloches are from a craft shop on Hennessy Road in Hong Kong.

These gorgeous little giraffes are from a bloke in Tianzifang market, Shanghai, who makes models out of old drinks cans. The picture is a frame I've posted about before here, and a piece of scrapbooking paper. I think the picture is cute but what really grabbed me was the relationship between the red dress and the teal frame. *Pop!
So there it is. Stage one of a three step plan.
Anybody else's creative journey look like this???


